

$410.00 inc. GST
DR FEICKERT Protractor NG is a revision of DR. Feickert’s famous “Universal Protractor”. The company have made operation easier and have enhanced the functionality as well as accuracy. On this Protractor, you can find all three well known, major geometries aka Baerwald, Lofgren and Stevenson.
DR FEICKERT Protractor NG Infomation:
Theory
The general geometrical correlation of a tonearm based on a fixed pivot point are well known since the fundamental publications of Baerwald and Lofgren back in the first half of the 20th century. The conclusion of both papers was that such a tracking device must have an angular offset (zenith) with a defined overhang. The offset and the overhang vary with the effective length of the tonearm itself. While tracking the record the stylus matches tangential position in the groove at two points – the inner and outer Null points (linear tracking position). In the early 1960s another mathematician has calculated a new set of parameters taking into account that on records with classical music very often crescendos occur towards the innermost grooves (Stevenson).
Step 1

Choose the geometry you want to use: Baerwald (B), Lofgren (L) or Stevenson (S).
Screw the gauge tower on the disc and place the Protractor on the platter. Aim with the pin in the gauge exactly over the pivot point of the tonearm. Move cartridge in the headshell so that stylus lands on the crosslines of your chosen geometry (B, L or S) at step 1 (overhang). In case you cannot reach either point on the Protractor please check your pivot-spindle distance.
Carefully tighten one screw a little bit and make sure you can still turn the cartridge in the headshell. Set anti-skating to zero.
Step 2
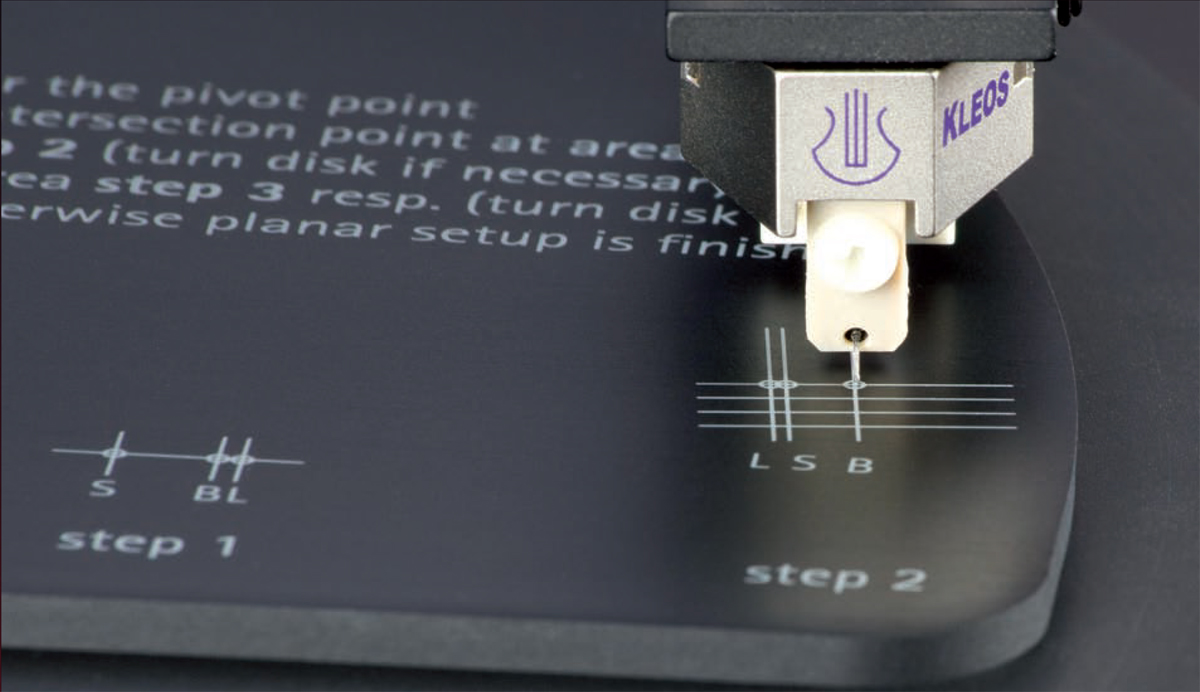
Turn Protractor so that you are over area of step outer Null-point). Set angular offset (zenith) so that the printed line on the Protractor and the cantilever of your cartridge fall in line when looking from the front. In case this is done carefully tighten both screws in an alternating way and take care the cartridge doesn‘t move anymore in this process. Caution! Don‘t overdo the tightening of the screws as really tight is followed by infinitely loose forever …
Double-check your setup either at step 3 (inner Null-point) where the cantilever MUST fall in line with the printed line or you can alternatively check the overhang again at step 1. Both approaches are mathematical equivalent; if two points are correct, the third is correct by default. In case the cartridge still is off, then start again from the beginning by checking the overhang first and subsequently all the following steps again.
